3D Beach Mug, Cute Farm Animals: Avoid These Sublimation Mistakes for Perfect Summer Mugs
You have the design file. You have the blank mug. You can already picture the finished product—a cheerful summer mug featuring adorable farm animals in a playful beach scene. Whether you are a hobbyist making gifts for family or a small business owner building a seasonal product line, the 3D Beach Mug, Cute Farm Animals sublimation design wrap offers a delightful way to create personalized 11 oz mugs that stand out. But here is the truth that many creators learn the hard way: the path from a beautiful digital download to a flawless finished mug is full of small, costly mistakes. This article walks you through the most common pitfalls and shows you exactly how to avoid them.
What You Are Actually Working With
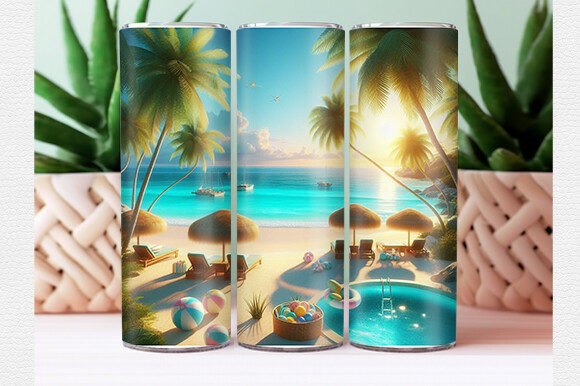
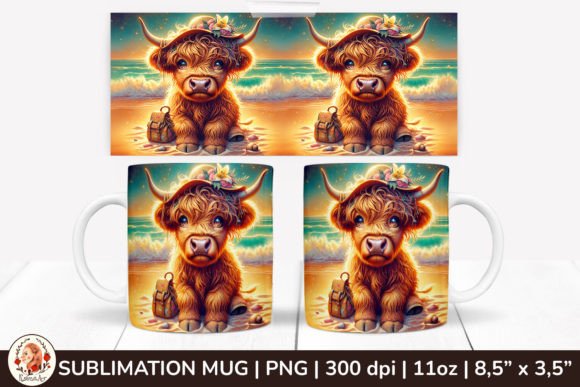
The design you are using is a specialized sublimation wrap intended for an 11 oz mug. It comes as a single PNG file on a transparent background, sized at 8.5 by 3.5 inches, with a crisp 300 DPI resolution. The theme combines the relaxed, sunny vibe of a beach scene with the charm of cute farm animals—think sheep wearing sunglasses or a pig building a sandcastle. It is a niche concept, but when executed well, it creates mugs that feel fresh, whimsical, and perfectly suited for summer gifting, market stalls, or personal use.
Understanding the specifications matters. That transparent background, for instance, is not just a convenience—it is a requirement. If you open the file and immediately drop it into a design program without checking your canvas size, you may accidentally stretch, crop, or distort the artwork. And when you are working with a tight wrap design that must align precisely around a curved mug surface, even slight distortion ruins the final result.
Mistake Number One: Ignoring the White Background Trap
One of the most frequent errors I see is creators assuming that a transparent PNG means they can print it directly as-is onto sublimation paper. The problem is subtle but critical. Your printer uses CMYK or RGB color profiles, and the transparent areas in the PNG will not print as white. In sublimation, white is not a printable color—it is the color of the substrate itself. If you place the design on a dark or colored mug, the transparent parts will simply show whatever mug color lies beneath. That cute farm animal's face may disappear into a dark background.
To avoid this, always remember: sublimation works best on white or very light substrates unless you are deliberately using a special technique for dark materials. Before you print, confirm that your mug blank is white or a pastel shade that will not fight the design. Also, check your print preview. If the software is filling the transparent areas with a white box, you are printing unnecessary ink. Instead, ensure your design software keeps the background truly transparent and that your printer settings do not override that.
Mistake Number Two: Misjudging Wrap Placement and Orientation
The 8.5 by 3.5 inch measurement is not arbitrary. It is engineered to fit the curved surface of a standard 11 oz mug. But that does not mean you can simply tape it on and hope for the best. Many beginners misjudge the vertical and horizontal alignment, resulting in a design that wraps awkwardly—too high, too low, or not meeting at the seam properly.
Take a moment to physically measure your mug. Different manufacturers produce 11 oz mugs with slightly different heights and circumferences. If your mug is taller or shorter than the standard, the wrap may leave an uneven gap at the top or bottom. You have two options: adjust the design scaling proportionally in your software, or source mugs that match the standard dimensions exactly. For consistent results, I recommend the second approach. Once you find a reliable mug supplier, stick with them. Small variations matter more in sublimation than most people realize.
Also, before pressing, do a dry test. Print the design on plain paper first, cut it out, and wrap it around the mug. Check where the edges meet, how the artwork aligns with the mug's rim and handle, and whether any important element falls in a spot that will be obscured by tape or the press itself. This five-minute check saves you from wasting sublimation paper, ink, and a mug blank.
Mistake Number Three: Overlooking Heat Press Technique
Sublimation is a chemical process, not just a heat transfer. The dye in the ink turns into a gas under high temperature and bonds with the polymer coating on the mug. If your heat press technique is inconsistent, your results will be splotchy, faded, or ghosted. The 300 DPI resolution of your 3D Beach Mug, Cute Farm Animals design deserves a proper pressing environment.
Here are the specific details that many people get wrong. First, the pressure. Too little, and the gas escapes unevenly. Too much, and the paper shifts or the mug cracks. A good rule is to apply firm, even pressure—not so tight that you hear the mug creaking, but enough that the paper contacts the surface uniformly. Second, the temperature. Most sublimation inks perform best between 385°F and 400°F (196°C to 204°C). Going lower risks incomplete dye migration. Going higher can cause bleeding or yellowing on the mug. Third, the time. For an 11 oz mug, 45 to 60 seconds is typical. But this depends on your specific press, mug thickness, and ambient temperature. Always test with a low-value blank first.
Another overlooked factor is the tape. Use thermal tape designed for sublimation, and apply it in thin strips. Regular masking tape can leave adhesive residue that bakes into the mug surface during pressing. That residue acts as a barrier, preventing the ink from reaching the coating in those spots. You end up with white dots where the tape was.
Mistake Number Four: Neglecting the Isolated Elements Logic
Your download contains isolated elements on a transparent background. That is a huge advantage—it means you can reposition individual design components, scale them, combine them with other graphics, or even use them for projects beyond mugs. But many people treat the PNG as a locked, unchangeable image. They print it exactly as downloaded, missing the creative flexibility the designer intended.
If you design for family members, you can personalize each mug by moving the farm animals around or adding names. The same base file can become a dozen different mugs with minor tweaks. This extends the value of a single purchase and helps you create gifts that feel custom, not mass-produced. However, be careful when you modify elements. Grouping and flattening layers can accidentally merge transparent areas with white fills. Always export your final design as a high-quality PNG with transparency preserved. Use 300 DPI consistently so you do not lose the sharpness that makes sublimation prints look professional.
Mistake Number Five: Forgetting to Prep the Mug
This sounds too basic to mention, yet it causes more ruined mugs than nearly any other issue. A brand-new mug straight from the box may have dust, oily fingerprints, or packaging residue on its surface. If you press the sublimation paper onto a contaminated surface, the ink may not adhere properly in those spots. The result is a design with faint, uneven patches that look like wear or fading.
Before you even turn on the heat press, wipe the mug with a lint-free cloth and isopropyl alcohol. Handle it only by the rim and bottom afterward. Do not touch the area where the design will sit. Also, check the mug for scratches or manufacturing defects. Sublimation does not hide surface flaws—it highlights them. A scratch that was invisible on a plain white mug becomes a glaring distracted line once the ink bonds.
Mistake Number Six: Underutilizing the Seasonal Appeal
Summer mugs are popular, but the window for selling or gifting them is narrower than you think. Many creators order designs too late, press mugs in a hurry, and end up with mediocre results. If you plan to use this Summer Mug Sublimation Design Wrap for your business or family gifts, start at least six weeks before summer begins. That gives you time to test, reprint any failures, and package the mugs attractively.
For a business, bundle three or four variations of the 3D Beach Mug, Cute Farm Animals theme into a summer set. Price them individually and as a collection. For family gifts, make each mug unique by changing the animal placement or adding a name. The transparent background makes this customization easy, but only if you plan your workflow in advance.
What To Check Before You Buy or Download
Before you commit to any sublimation design, verify the file specifications: PNG format, transparent background, 300 DPI, and the correct size for your mug. A design that claims to fit an 11 oz mug but is actually 7 inches wide will not wrap properly. Also, look closely at the preview images. Are the farm animals clearly rendered? Is the beach scene detailed enough at the mug's curved surface size? Low-resolution previews can hide pixelation that becomes obvious only after printing.
Read the product description carefully. Some sellers include a mockup for reference but do not clarify whether the design includes isolated elements. In this case, your download explicitly includes isolated elements—that is a feature you should exploit. If a listing seems vague, ask the seller before purchasing. Reputable sellers in the sublimation niche are usually happy to clarify.
And finally, check your own equipment. Your printer must support sublimation ink. Your heat press must reach the required temperature evenly. Your mug blanks must be sublimation-coated, not just ceramic. Regular ceramics do not bond with sublimation ink. The design will wipe off or look faded.
Final Thoughts for Better Results
The 3D Beach Mug, Cute Farm Animals sublimation design is a creative, versatile resource for summer-themed mugs. But like any tool, its quality in your hands depends on your technique and attention to detail. Avoid the common mistakes I have outlined here—the transparent background trap, misaligned wraps, poor heat press habits, neglected mug prep, and last-minute rushing. By taking a deliberate, patient approach, you will produce mugs that are vibrant, durable, and genuinely delightful.
Whether you are making one mug for yourself or fifty for a summer market, every step from download to finished product matters. Pay attention to the specifications, respect the process, and let the cute farm animals and sunny beach details shine exactly as they were designed to do.