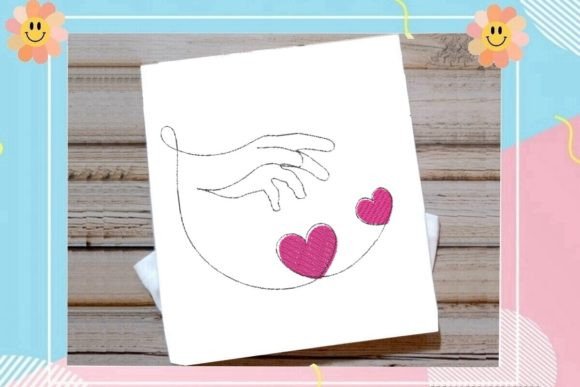
Eye Lashes Machine Embroidery Design: A Practical Workflow Asset for Creative Projects
Embroidery enthusiasts and small business owners know that the difference between a good product and a great one often comes down to the details. The Eye Lashes machine embroidery design is one such detail—a motif that brings life, movement, and a touch of artistry to everything from apparel to accessories. Unlike generic floral or geometric patterns, this design captures a stylized, expressive shape that can be adapted across multiple project types. But the real value lies not just in how it looks, but in how it integrates into your existing production workflow, whether you are a hobbyist working on a single tote bag or a small apparel brand scaling up custom orders.
What Is the Eye Lashes Design and Where Does It Fit in a Broader Process?
At its core, the Eye Lashes design is a digitized embroidery motif that reproduces the graceful curves and layered strokes of eyelashes. Offered in multiple embroidery file formats (.dst, .pes, .exp, .vp3, .hus, and others), it is compatible with most commercial and home embroidery machines, including those from Brother, Janome, Bernina, Tajima, Melco, and Singer. The design typically comes in one or more sizes, allowing for placement on various surfaces without manual resizing.
In the broader context of product creation, the Eye Lashes design acts as a decorative focal element. It can be used:
- Before a project – as a planning reference for color palettes, material testing, or client mood boards.
- During a project – as a primary or accent embroidery element added to cut-and-sew pieces or finished blanks.
- After a project – to embellish existing items, repair damaged designs, or add a unifying brand signature to a product line.
Understanding where the design fits in your own timeline helps you allocate machine time, stabilizer choices, and thread inventory efficiently.
How Eye Lashes Interacts with Tools, Resources, and Decisions
Successful embroidery doesn’t happen in isolation. The Eye Lashes design interacts with several other elements of your workspace:
1. Embroidery Software and Editing
Even if the file arrives ready-to-stitch, most creators benefit from opening it in a digitizing program such as Wilcom, Hatch, Embird, or SewArt. Use the software to:
- Test thread color changes – assign different shades of black, gray, or even metallic blue to the lashes for depth.
- Adjust density and underlay – if your fabric is lightweight (e.g., cotton voile) or stretchy (jersey), modify stitch counts to avoid puckering.
- Combine with other motifs – layer the Eye Lashes design alongside text, florals, or geometric frames to create custom compositions.
2. Machine Compatibility and Format Selection
Most suppliers provide a selection of formats. Before downloading, verify which ones your machine reads natively. For example, Brother machines widely use .pes, while Tajima prefers .dst. If you own a multi-format machine, test a small stitch-out from each format to verify registration and thread order. Many experienced embroiderers keep a “master folder” with all formats organized by hoop size and fabric type.
3. Fabric and Stabilizer Choices
The Eye Lashes design contains fine curves and satin stitches. For crisp results, choose a medium-weight cutaway stabilizer for knits or a tear-away stabilizer for wovens. Towels and fleece require a water-soluble topping to prevent stitches from sinking into the nap. Testing a small sample on a scrap of your intended material before mass-production saves time and thread.
Practical Implementation Tips and Workflow Examples
Integrating Eye Lashes into a real workflow means making decisions about placement, hooping, and production order. Here are three practical scenarios:
Example 1: Adding Eye Lashes to Ready-Made Tote Bags
Process: You purchase blank canvas tote bags in bulk. The goal is to add a small Eye Lashes design near the top center of each bag.
- Prepare the hoop: Use a 4x4 or 5x7 hoop. Mark the center of the bag with a water-soluble pen.
- Stabilize: Hoop a piece of cutaway stabilizer, then float the bag on top using temporary adhesive spray. This prevents hoop burns on the canvas.
- Stitch out: Load the .pes file from a folder named “Tote Eye Lashes.” Run a test stitch with a single color thread (e.g., black) to check alignment.
- Quality control: Trim jump threads on the back. If the stitch count is too dense, reduce density in software. Once satisfied, repeat for remaining bags.
This workflow treats Eye Lashes as a decoration added after the bag is assembled, which is efficient for small batches.
Example 2: Using Eye Lashes as a Brand Element in Apparel
Process: A small streetwear brand wants a subtle eye lashes motif on the sleeve of hoodies. The motif must align with a pre-existing sleeve seam.
- Digitize the placement: Open the design in software and rotate it 90 degrees so the lashes curve along the sleeve length.
- Create a placing tool: Print a template of the design on paper, hold it against the sewn sleeve, and mark registration points with chalk.
- Hoop the sleeve: Use a tubular hoop or a magnetic hoop system to avoid hoop burn. Add water-soluble topping to prevent the stitches from sinking into the fleece.
- Stitch and inspect: Run a low-speed test stitch to confirm thread tension. Because Eye Lashes uses satin stitches, check the bobbin thread density—if it shows on the top, tighten the upper tension.
Here the design is incorporated during the final assembly stage, acting as a consistent brand signature across seasonal drops.
Example 3: Workshop Teaching with Eye Lashes
Process: An embroidery educator plans a class on advanced satin stitches using the Eye Lashes design.
- Before the class: Pre-hoop stabilizer for each student machine, pre-load the design onto USB drives, and prepare cheat sheets about file formats.
- During the class: Demonstrate how to change thread colors, slow down machine speed for curves, and handle thread breaks.
- After the class: Students can take the file home to stitch onto their own projects, extending learning into personal workflow.
In an educational context, Eye Lashes serves as both a learning tool and a deliverable.
Usability, Organization, and Long-Term Use
To keep Eye Lashes designs accessible and repeatable over months or years, adopt a few organizational habits:
- Name files descriptively: “EyeLashes_4x4_black_satin.dst” is more useful than “EL001.dst.”
- Maintain a test log: After each sample stitch-out, note the stabilizer type, fabric, tension settings, and thread brand. This record accelerates troubleshooting later.
- Back up formats: Store all the supplied file formats (PES, DST, EXP, etc.) in a cloud folder and on a local drive. If you upgrade machines later, having the raw DST can be converted without losing quality.
- Plan for scaling: If you later need a larger version, many digitizers offer scaling services. Original file proportions should be preserved; avoid scaling beyond ±150% in software as stitch density degrades.
Quality Control and Consistency Across Projects
Because Eye Lashes is a curved, detailed design, minor issues like shifting fabric or incorrect tension can make the curves look jagged. Build a simple quality checklist into your workflow:
- Before hooping: Check that the fabric is free of wrinkles and that the stabilizer is not expired (old stabilizer loses adhesion).
- During stitching: Monitor the first few millimeters of the lashes. If the bobbin thread pulls to the top, increase upper tension by 0.5. If the satin stitches push apart, reduce stitch density or use a tighter underlay.
- After trimming: Hold the embroidery up to natural light to inspect for gaps. Use a lint roller to remove stabilizer residue from the fabric surface.
- Consistency for multiple pieces: If you are producing ten identical tote bags, run a single sample, then document all settings. For the remaining nine, load the same settings file and check only the first seam.
Long-Term Integration into a Creative Routine
The Eye Lashes machine embroidery design is not a one-time asset. Once you have stitched it a few times, you will discover ways to adapt it: scale it down for monogram accents, combine it with a half-circle shape to create an open eye motif, or use metallic thread for a glam finish on evening clutches. The design’s flexibility lies in its simple lines—it can read as abstract, feminine, retro, or even surreal depending on context.
For small business owners, having a versatile motif like this reduces the need to constantly purchase new digitizing files. It becomes a reliable go-to that can be reused across multiple seasons with different color palettes or fabrics. For hobbyists, it offers a satisfyingly complex stitch-out that builds confidence in handling curves and satin stitches.
When you treat the Eye Lashes design not just as a pretty pattern but as a reusable component in a controlled workflow, you save time, reduce waste, and produce results that look professional. Whether you are decorating a single tote bag for a gift or producing a hundred units for a craft fair, the principles remain the same: plan, test, document, and execute with consistency.
Final Observations on Implementation
Many machine embroidery projects fail not because of mismatched designs but because of poor preparation. The Eye Lashes design is robust enough to handle light adjustments, but it still rewards careful thought. Start by testing on fabric that matches your final material. Keep a small notebook (or digital note) dedicated to embroidery settings for each design you own. Over time, you will build a reference that makes every new project faster and more predictable.
The Eye Lashes design also interacts well with other decorative techniques. Combine it with appliqué (cut a fabric backing behind the lashes) or with beadwork (hand-sew tiny beads at the tips). Experimentation becomes systematic when you treat each variation as a controlled test rather than a guess.
Ultimately, the Eye Lashes machine embroidery design earns its place in your digital library because it solves a real problem: how to add expressive, organic movement to stitched goods without spending hours digitizing from scratch. By integrating it thoughtfully into your before, during, and after project phases, you unlock a reliable tool that enhances both creative satisfaction and commercial value.