Master the Studio Graphics Panel: Unlock Creative Efficiency and Exploration
In today’s fast-paced creative landscape, every designer, marketer, and entrepreneur is looking for ways to work smarter, not harder. The Studio Graphics Panel—often overlooked yet incredibly powerful—has become a central tool for those who want to streamline their workflow and push creative boundaries. Whether you are a freelancer juggling multiple client projects or a content creator building a personal brand, understanding how to use the Studio Graphics Panel more efficiently can transform the way you manage visual assets, particularly when working with PNG files and layered graphics. This article goes beyond basic feature explanations to explore why this panel matters, how it fits into broader creative and business trends, and practical strategies that will help you bring your projects to life with greater ease and impact.
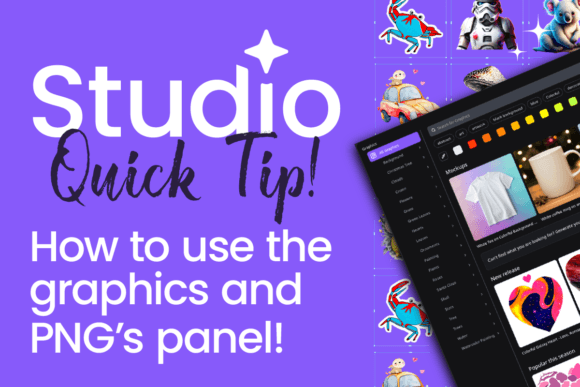
Understanding the Studio Graphics Panel: More Than a File Browser
At its core, the Studio Graphics Panel is a centralized interface for importing, organizing, and applying graphic assets—most commonly PNG images with transparency. But reducing it to a simple file manager would be a mistake. Modern design software, from vector editors to compositing tools, now integrates such panels as hubs for creativity. The PNG format, with its ability to preserve alpha channels, makes it ideal for overlays, textures, icons, and character assets. When you learn how to use the Studio Graphics Panel more efficiently, you are not just clicking and dragging; you are establishing a systematic approach to asset handling that minimizes friction and maximizes time for actual design thinking.
Professionals in fields like UI/UX design, motion graphics, and digital marketing rely heavily on reusable graphic elements. A logo, a set of social media icons, or a library of transparent textures can be stored, searched, and applied in seconds. This shift from one-off file retrieval to intelligent asset management reflects a larger trend in the creative industry: the move toward modular workflows and component-based design. By mastering the panel, you align your practices with current expectations of speed, consistency, and scalability.
Why Efficiency in the Graphics Panel Matters Now
The creative industry has seen a dramatic acceleration in project turnaround times. Clients expect near-instant revisions, social media posts need to be published daily, and iterative design cycles have shortened. In this environment, any tool that shaves seconds off a repetitive task becomes invaluable. The Studio Graphics Panel, when used effectively, eliminates the constant switching between folders, previews, and import dialogs. Instead, you can preview, filter, and drop assets directly into your composition.
Moreover, the rise of remote and hybrid work has made asset consistency a challenge. Teams spread across time zones need a shared understanding of which graphics are approved, up-to-date, and easily accessible. The panel acts as a visual library that can be synced across projects and team members. Understanding how to use the Studio Graphics Panel more efficiently thus becomes a collaborative skill—one that reduces miscommunication and accelerates creative alignment. Entrepreneurs and freelancers who adopt these practices early set themselves apart as reliable and fast professionals.
Consumer expectations also drive this need. Audiences today are visually literate; they notice sloppy edits, low-quality assets, or inconsistent branding. Using the Studio Graphics Panel ensures that you always have high-resolution, properly transparent PNGs at your fingertips, allowing you to maintain a polished output even when working under pressure. The panel is not just a convenience—it is a quality control mechanism.
The Shift Toward Asset Libraries and Reusability
One of the most significant developments in creative software is the emphasis on asset libraries. Whether you use Studio in a broader graphic design suite or within a specialized tool like Spine or Live2D, the concept is the same: build once, reuse often. This philosophy aligns perfectly with the PNG panel’s capabilities. Efficient users don’t just collect random files; they curate libraries organized by project, style, or function. For example, a game developer might have separate folders for characters, props, UI elements, and backgrounds—all with transparent PNGs stored in the panel for instant dragging into the scene.
This reusable approach saves enormous time and mental energy. Instead of recreating standard elements like buttons, logos, or decorative flourishes, you retrieve them from the panel. Understanding how to use the Studio Graphics Panel more efficiently involves learning to tag, sort, and preview your assets so that you can find the exact graphic you need without scrolling through hundreds of thumbnails. Many panels support batch importing, color tagging, and even custom metadata. Savvy users take advantage of these features to create a personalized taxonomy that maps to their workflow.
This trend mirrors the broader move toward component-based design in web development and digital graphics. Just as developers use reusable code components, designers are now expected to maintain visual components. The Studio Graphics Panel is the bridge that enables this practice. By treating your graphics as modular building blocks, you can experiment with compositions more freely, swapping out elements without rebuilding the entire file.
Practical Techniques for Efficient Panel Usage
Let’s move beyond theory and into actionable insights. When you set out to improve your efficiency with the Studio Graphics Panel, start by auditing your current asset library. Remove duplicates, rename files consistently, and group related graphics into folders. This upfront investment pays off exponentially. For instance, if you frequently work on social media templates, create a category specifically for “Instagram Stories – Overlays” and include all your PNG frames, sticker-like elements, and highlight icons.
Next, learn the keyboard shortcuts and mouse gestures that your software offers for the panel. Many Studio tools allow you to quickly toggle visibility, cycle through assets, or bulk-import using drag-and-drop from a file explorer. Combine these with how to use the Studio Graphics Panel more efficiently by memorizing the hotkeys for adding assets directly to the selected layer or composition. This reduces the number of clicks from five to one, which over a day can save hours.
Another powerful technique is utilizing the panel’s preview and filtration capabilities. Instead of blindly dropping a PNG into your work, use the larger preview to check for aliasing, edge artifacts, or unexpected transparency. Many modern panels also support real-time filtering by color, dimension, or creation date. Advanced users can create “smart collections” that automatically gather assets based on specific criteria. For example, collect all PNGs larger than 1000 pixels or all assets last modified this week. This dynamic organization is far superior to static folder structures when you are juggling active projects.
Consider also the practice of using the panel as a prototyping tool. Instead of building a final layout immediately, use the panel to drag multiple asset variations into the canvas to compare composition quickly. This “sketching with assets” method lets you explore creative directions without committing to a single file. It encourages iteration and reduces the fear of making mistakes because swapping out a PNG is trivial.
Exploring Creativity Through Constraint and Automation
Efficiency does not stifle creativity; it amplifies it. When you invest time in mastering how to use the Studio Graphics Panel more efficiently, you free up cognitive bandwidth for the parts of design that truly require human intuition. The repetitive tasks of importing, resizing, and aligning are handled in seconds. You can experiment with unexpected combinations of transparent graphics without worrying about the overhead of file management.
For example, a marketer creating a series of social media posts can use the panel to quickly swap headlines, product shots, and background textures—all PNGs with transparency—while maintaining a consistent branded feel. This rapid exploration often leads to surprising layouts that work better than the originally planned design. Because the panel provides instant visual feedback, you can test more variations in less time, thereby increasing the chances of discovering a standout composition.
Furthermore, many Studio environments now allow you to apply transformations directly within the panel—like scaling, rotating, or changing opacity—before committing the asset to the scene. This means you can preview how a graphic will look in context without extra steps. Understanding this capability is part of how to use the Studio Graphics Panel more efficiently. It turns the panel from a passive library into an active design assistant.
Connecting to Larger Developments: Collaboration and Cloud Integration
The future of graphic panels is tightly linked to cloud collaboration and cross-platform consistency. As more creative tools move to web-based ecosystems, panels like the Studio Graphics Panel will likely support real-time syncing across devices and team members. Already, some implementations allow you to share entire asset libraries with teammates or access them from mobile preview apps. This development reflects a broader industry push toward anywhere-access workflows, enabling freelancers to start a project on their desktop and finish on a tablet during a commute.
Another trend is the integration of AI-powered tagging and recognition within panels. Imagine describing the asset you need (e.g., “transparent PNG of a blue circle with a star”) and the panel instantly filtering to the correct file. While still emerging, such features promise to make how to use the Studio Graphics Panel more efficiently even more intuitive. Early adopters who already practice organized library management will be well-positioned to leverage these AI enhancements.
The rise of video-first content has also influenced the panel’s evolution. Marketers who produce short-form videos need quick access to PNG overlays, lower-thirds, and animated stickers. As Studio tools expand into motion graphics, the panel becomes a launchpad for 2D animation assets. Efficient management across still and motion formats is a skill that forward-thinking creators are already cultivating.
Your Next Steps: Embrace the Panel as a Creative Partner
To truly benefit from the Studio Graphics Panel, approach it not as a utility but as an integral part of your creative process. Start by reorganizing your existing PNG assets into a logical structure. Spend an afternoon learning the panel’s advanced features like batch operations, custom previews, and smart collections. Then, challenge yourself to complete a small project using only assets from the panel, forcing you to rely on efficient retrieval rather than manual file browsing.
Sharing is also learning. Engage with online communities of Studio users to exchange tips on how to use the Studio Graphics Panel more efficiently. You will discover tricks that the documentation never mentions—like using the panel to quickly test color palettes by dragging in colored squares, or creating a set of “spacer” PNGs for layout guides. These community-driven insights can dramatically improve your speed.
Finally, remember that efficiency is a means to an end: more time for exploration, iteration, and creative boldness. The panel should help you work faster, but it should also encourage you to try new visual directions. Let it handle the repetitive tasks. You focus on the magic. By mastering the Studio Graphics Panel, you are not just learning a feature—you are adopting a mindset of deliberate, organized creativity that scales with your ambitions.