How to Make a Halloween Tote Bag
There is something deeply satisfying about carrying a bag you made yourself, especially when it channels the playful, slightly spooky energy of autumn. A Halloween tote bag is more than a seasonal accessory. It is a canvas for personal expression, a practical item for trick-or-treating, and a project that invites creativity without requiring advanced skills. Whether you are a seasoned maker or someone who rarely picks up a craft tool, designing your own Halloween tote bag offers a tangible, useful result you can actually take out the door.
Why a Halloween Tote Bag Deserves a Place in Your Season
Store-bought seasonal decor and accessories can feel generic. A handmade tote bag, on the other hand, carries your own choices in fabric, color, motif, and finish. It becomes a signature piece that reflects your style, whether that leans toward whimsical ghosts, classic black-and-orange motifs, or something more minimalist with a subtle nod to the season. Beyond personal satisfaction, a Halloween tote bag is genuinely useful. It can hold candy on Halloween night, carry groceries to a harvest gathering, or serve as a gift bag for a spooky-themed present. It also makes a thoughtful, handmade gift for friends, coworkers, or family members who appreciate something original.
For creators and small business owners, a custom tote bag can even become a product offering. Limited-edition Halloween designs are popular at craft fairs, online shops, and local markets. The barrier to entry is low, and the creative possibilities are wide open.
Exploring Creative Directions for Your Tote Bag
The beauty of making your own Halloween tote bag lies in the range of aesthetics you can pursue. One approach is not better than another; the right direction depends on who you are designing for and what atmosphere you want to evoke.
Classic Halloween Motifs with a Personal Twist
Traditional Halloween imagery never goes out of style. Pumpkins, bats, black cats, crescent moons, and spiderwebs form a visual vocabulary that most people recognize instantly. You can work with these elements using fabric paint, iron-on transfers, embroidery, or appliqué. The key is to add a personal detail that sets your bag apart. Maybe the pumpkin wears a pair of oversized glasses, or the bat has an unexpectedly cheerful expression. Small variations like these make the design feel human and memorable without losing the seasonal connection.
Minimalist and Modern Interpretations
Not everyone wants a bag covered in bright orange and purple. A minimalist Halloween tote can be equally effective and often more wearable beyond October 31. Consider a neutral fabric like cream, charcoal, or olive, with a single embroidered motif in black thread. A simple line drawing of a spider, a tiny ghost, or a single pumpkin stem can be subtle yet unmistakably seasonal. This approach appeals to adults who want to participate in the holiday without feeling costume-like. It also works well for professional environments where a bold Halloween print might feel out of place.
Whimsical and Playful Styles
If your audience includes children, or if you simply enjoy a lighter tone, a playful design can bring a lot of joy. Bright colors, friendly monsters, grinning jack-o-lanterns, and sparkly accents create a bag that feels festive and fun. You can use puffy fabric paint for texture, add googly eyes, or sew on small felt shapes. These bags are especially popular for trick-or-treating because they are sturdy enough to hold candy and cheerful enough to make kids smile. They also photograph well, which matters if you plan to share your work on social media or use the bag as part of a content series.
Adapting the Project for Different Audiences and Goals
One of the most valuable aspects of learning how to make a Halloween tote bag is how easily the process can be adapted. The same basic construction technique can serve vastly different purposes depending on material choices and design direction.
For Personal Use
When making a bag for yourself, you have total freedom. Choose fabrics that match your wardrobe, select a size that fits your daily routine, and invest time in details that matter to you. A lined interior, a zippered pocket, or reinforced handles can elevate a simple tote into something you reach for regularly. Consider how you will use the bag. If it is primarily for trick-or-treating, a wider base and sturdy bottom will hold more weight. If it is for everyday errands, a medium size with a comfortable strap length works best.
For Gifting
A handmade tote bag makes a generous, personal gift. When designing for someone else, think about their color preferences and style. Do they love rich jewel tones, or do they prefer earthy neutrals? Do they appreciate bold graphics, or would they prefer something subtle? You can also tailor the design to their interests. A friend who loves gardening might appreciate a tote with a embroidered pumpkin vine. A colleague who adores vintage aesthetics might enjoy a bag with a retro ghost motif in muted orange and brown. The thoughtfulness of the customization is what makes the gift meaningful.
For Selling or Content Creation
If you are a small business owner, blogger, or content creator, a Halloween tote bag can be both a product and a portfolio piece. For selling, focus on designs that are reproducible without sacrificing quality. Stenciling, screen printing, and iron-on vinyl are efficient methods that still allow for customization. For content, document the process step by step. Videos of fabric cutting, stitching, and final reveal shots perform well on platforms like Instagram, TikTok, and Pinterest. You can also create a themed series, such as “three ways to style a Halloween tote” or “how to match your bag to your costume.”
Practical Guidance for Clear and Consistent Results
A successful Halloween tote bag balances creativity with craftsmanship. You do not need to be a professional sewer to produce something clean and durable, but a few practical considerations will help your final piece look intentional rather than rushed.
Choose the Right Fabric
Cotton canvas is a reliable choice for tote bags because it holds shape well, takes paint and dye beautifully, and withstands regular use. Lighter cotton muslin works for smaller bags or projects that require more drape, but it may need interfacing for structure. If you want a bag that is water-resistant for outdoor use, consider a coated cotton or a poly-cotton blend. Avoid stretchy knits unless you have experience stabilizing them with interfacing, as they can warp during sewing and printing.
Plan Your Design Placement
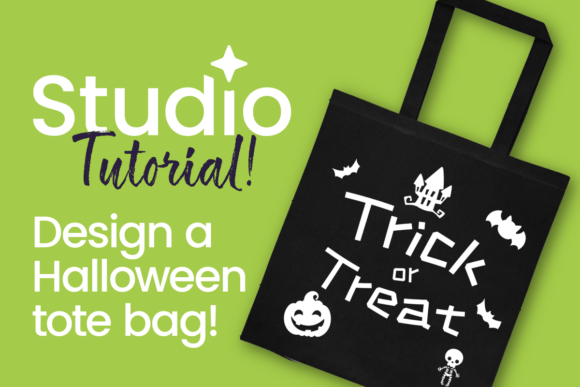
Before you commit to painting or stitching, sketch your design on paper and place it on the fabric to check proportions. Center the main motif for a balanced look, or place it slightly off-center for a more dynamic composition. If you are using multiple elements, consider how they interact. A large pumpkin in the middle with small bats floating above creates a clear focal point. Scattered stars or dots can fill empty space without overwhelming the design.
Test Your Materials
Fabric paint, markers, and transfers behave differently depending on fabric type and weave. Always test on a scrap piece of the same material before working on your final bag. This simple step prevents unpleasant surprises like bleeding colors, uneven coverage, or transfers that peel after washing. If you plan to wash the bag, use fabric medium with acrylic paint or choose paints labeled as washable and permanent. Heat-setting with an iron usually improves durability.
Pay Attention to Construction
A well-constructed tote bag looks professional and lasts longer. Double-stitch the handles where they attach to the bag body, as these points bear the most stress. Reinforce the bottom seam with a second line of stitching or a box corner construction. If you are sewing for others or for sale, finish all raw edges with a serger, zigzag stitch, or bias tape to prevent fraying. These details might seem minor, but they make the difference between a bag that feels flimsy and one that feels substantial.
Keeping Your Design Original and Audience-Friendly
Originality does not require reinventing the wheel. You can work within familiar Halloween themes and still produce something that feels fresh. The key is to make deliberate choices about color palette, scale, texture, and detail. For example, instead of using standard orange and black, try a palette of deep plum, sage green, and copper. The result will still read as Halloween, but it will stand apart from mass-produced options.
If you are designing for a specific audience, consider what resonates with them. Younger adults often appreciate clever, witty designs or references to pop culture Halloween classics. Older audiences might prefer elegant, understated motifs. Families with children tend to respond to bright, friendly imagery. And if you are creating content for social media, designs that are photogenic and easy to showcase in flat lays or lifestyle shots will perform better.
Consistency in your design language also matters. If you mix too many styles, colors, or techniques in one bag, the result can feel chaotic. Stick to two or three main colors, one or two motifs, and a single technique for the primary decoration. This restraint often leads to a more polished, professional outcome.
Practical Inspiration to Get Started
If you are feeling inspired but unsure where to begin, here are three concrete project ideas that cover different skill levels and use cases.
- The Classic Candy Collector: Use a medium-weight canvas in natural or cream. Paint a large black cat silhouette on the front, with a crescent moon above. Add a pocket on the inside for keys or a phone. This bag is roomy enough for trick-or-treating and neutral enough to use year-round after Halloween passes.
- The Minimalist Ghost: Choose a charcoal or slate fabric. Embroider a simple ghost outline in white or silver thread on the front panel. Keep the back blank or add a tiny embroidered star. This bag works well as a gift for a coworker or friend who prefers subtle seasonal touches.
- The Playful Monster: Use bright orange or purple felted wool. Cut out irregular shapes for eyes, teeth, and horns, and sew them onto the bag front to create a friendly monster face. Add a fabric lining in a contrasting color like lime green. This design is especially popular with children and makes a great project for beginner sewers.
Each of these ideas can be scaled, simplified, or elaborated depending on your time, tools, and confidence level.
Making the Process Enjoyable and Repeatable
Learning how to make a Halloween tote bag should feel like a creative outlet, not a chore. Set aside enough time to work without rushing, especially if you are trying a new technique. Gather all your materials beforehand so you are not interrupted mid-project. And do not be afraid to experiment. If a design does not turn out exactly as planned, you can often adapt it into something unexpected and even better.
For those who plan to make multiple bags, whether for gifts or for sale, create a template for your design placement and a checklist of construction steps. This consistency saves time and ensures each bag meets the same quality standard. It also allows you to offer variations, such as different colorways or motif options, without starting from scratch each time.
A Halloween tote bag is a small project with a big payoff. It is wearable, giftable, and shareable. It connects you to the season in a hands-on way that buying a plastic pumpkin bucket simply cannot match. Whether you are stitching for yourself, your family, or your customers, the process of making something by hand adds meaning to the holiday. And when you carry that bag out the door on a crisp October evening, you are not just holding candy or groceries. You are carrying a piece of your own creativity.