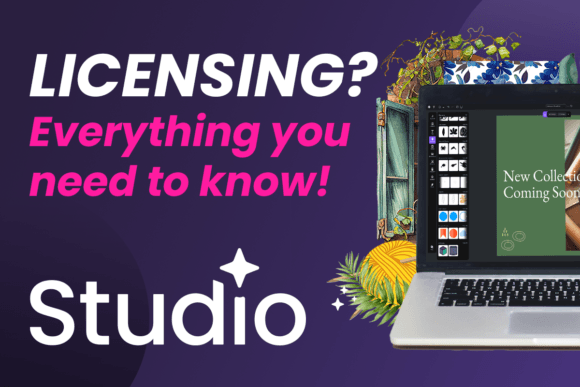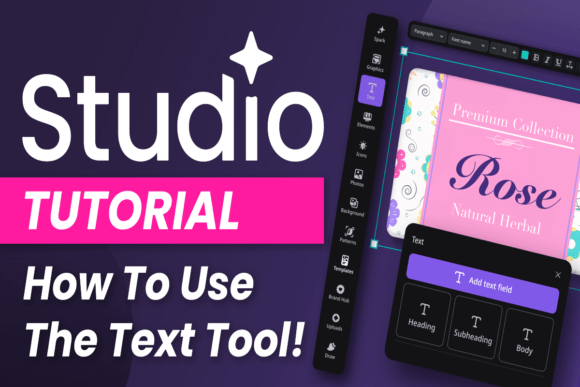
How to Use the Text Tool in Studio
If you’ve spent any time in a design platform, you know that text can make or break a project. The Text Tool in Studio is one of those features that looks simple at first glance—pick a font, type something, move it around. But once you start digging into its capabilities, you realize it’s a lot more than that. Whether you’re putting together a quick social media graphic, building a presentation for clients, or crafting a digital flyer for your community group, understanding how to use this tool effectively saves you time and gives your work a polished, professional feel.
I’ve watched people spend ten minutes wrestling with spacing or alignment when a few clicks inside the Text Tool would have solved everything. It’s not about being a design expert; it’s about knowing the shortcuts and options that are right in front of you. Let’s walk through the practical side of using the Text Tool in Studio, from everyday scenarios to those moments when you need text to carry the entire message.
Why Text Matters in Your Studio Projects
Text is rarely just text anymore. It’s a headline that stops a scroll, a call to action that drives a sale, or a label that explains a complex idea. In Studio, the Text Tool lets you treat words like design elements—adjustable, stylable, and flexible enough to fit into any layout. The reason people keep coming back to this feature is that it balances control with ease. You don’t need to code or fiddle with obscure settings. You just need to know what you want to say and how you want it to look.
I remember helping a friend who runs a small bakery. She wanted to make a menu board for her Instagram story. Within Studio, she typed out the items, adjusted the spacing so it felt airy, changed the color to match her brand’s pastel palette, and added a subtle shadow behind the text so it popped against a photo of croissants. That took less than five minutes. The response she got? People asking if she hired a designer. That’s what the Text Tool can do when you use it thoughtfully.
Getting Started with the Text Tool
If you’re new to Studio, the Text Tool is usually accessible from the main toolbar or a side panel. You click it, and a text box appears. That’s your blank canvas. From there, you can type directly, choose a font from the library, and adjust size, color, alignment, and line height. The real magic, though, is in the details like letter spacing (tracking), line spacing (leading), and text effects like outlines or drop shadows.
One thing that trips people up is thinking they have to stick with the default settings. You don’t. You can rotate text, curve it, create stacked layouts, or even combine different fonts within the same block. The key is to experiment on a copy of your project first. Pressing “Ctrl+Z” or “Cmd+Z” is your best friend. Once you feel comfortable, you’ll start seeing opportunities everywhere—a quote on a photo, a subtitle on a video thumbnail, or a list of features on a product graphic.
Real-Life Scenarios Where Text Design Shines
The beauty of the Text Tool in Studio is how it adapts to different needs. Let’s look at a few common situations where people get the most value out of it.
For Social Media Creators
You’re posting three times a week, and each post needs a caption-style text overlay. Instead of recreating the same format manually every time, you can use the Text Tool to set up a template. Choose your font once, adjust the color to match your brand, and save that text block as part of a Studio template. Then each week, you just double-click the text, replace the words, and export. The consistency builds recognition, and your followers start expecting that clean, unified look.
I’ve seen creators use this for quotes, tips, and announcements. By playing with text alignment—centered for a bold statement, left-aligned for a list—they change the tone without starting from scratch. The Text Tool’s ability to adjust transparency also helps when you want text to sit softly over an image without overpowering it.
For Small Business Owners and Entrepreneurs
Imagine you’re launching a new service package. You need a one-page PDF summary for a consultation meeting. In Studio, you can create a clean layout with a headline, a subheadline, and a short list of benefits. The Text Tool allows you to use bullet lists (via manual formatting or by copying from a simple editor) and to emphasize key phrases with bold or color. The ability to control line height ensures that even a dense block of text remains readable.
For entrepreneurs, time is everything. The Text Tool lets you update pricing or offers without redoing the entire design. Just select the text box, edit the numbers, and you’re done. That agility is especially useful when you’re running limited-time promotions and need to update materials fast.
For Bloggers and Publishers
Bloggers often create featured images for their posts. A compelling headline over a relevant background image drives click-throughs. Using the Text Tool in Studio, you can pick a bold, no-nonsense font, add a subtle gradient behind the text (by using a shape or background layer), and position the text off-center for visual interest. Publishers who produce digital magazines or newsletters can set consistent header styles across issues by saving text presets.
One blogger I know uses the Text Tool to create pull quotes that break up long text in her articles. She exports the pull quote as an image, then inserts it into her post. The contrast between the large, styled quote and the body text makes readers pause—and often share the image on social media.
For Educators and Freelancers
Teachers making handouts or instructional slides can use the Text Tool to create clear, scannable content. By using numbered lists and short paragraphs with different font sizes (title, subtitle, body), students can quickly find key points. Freelancers designing client proposals or portfolio pieces benefit from the tool’s ability to add subtle emphasis—like a colored underline or a different weight for a client’s name.
I’ve also seen freelance designers use the Text Tool in Studio to mock up ad copy for client previews. Instead of sending a flat PDF with plain text, they style it with the client’s brand font and show how the text interacts with imagery. That extra step often wins the project.
What to Keep in Mind Before Using the Text Tool
As straightforward as the Text Tool is, a few considerations can save you rework. First, think about the final output. If your project will be printed, make sure your text color has enough contrast with the background—especially with light fonts on white paper. If it’s for digital use, consider that some fonts render differently on screens. Test your text on a mobile view if possible, because Studio often has a preview option.
Second, avoid overcrowding. The Text Tool gives you many styling options, but that doesn’t mean you should use all of them at once. Pick one or two focal points—maybe a bold headline and a colored accent line—and let the rest be simple. Readers don’t read busy designs; they scan them. Clear hierarchy helps them get the message instantly.
Third, consistent spacing matters. Leading (line height) that’s too tight makes paragraphs look cramped. Too loose and they feel disconnected. The standard rule of thumb is to set line height to about 1.5 times the font size for body text. For headlines, you can go tighter. The Text Tool in Studio usually has a slider for this, and it’s worth adjusting after you paste your text.
Lastly, think about legibility. Cursive or decorative fonts have their place, but they’re hard to read in large blocks. Use them sparingly—like for a single word or a short tagline. For everything else, stick with a clean sans-serif or serif and let the layout do the heavy lifting.
The Outcome: More Than Just Words
When you master the Text Tool in Studio, the result isn’t just prettier text. It’s faster turnaround times, more consistent branding, and a better experience for the people who see your work. You stop wrestling with formatting and start focusing on your message. That shift matters whether you’re a marketer prepping a campaign, a teacher creating a lesson plan, or a hobbyist designing a birthday invitation.
The tool is there to serve you, not overwhelm you. Start with a single project—maybe a quote graphic or a simple flyer—and play with the options. Change the letter spacing. Try a different alignment. Add a drop shadow. See what feels right. Over time, you’ll develop a sense for when a little tweak changes everything. That’s when the Text Tool becomes second nature, and you wonder how you ever worked without it.
So next time you open Studio, give the text more than a passing glance. Type something, adjust it, and see how a few thoughtful choices can turn plain words into a design that actually works for you.